
 As a homeowner, discovering a leaking roof shingle can cause considerable concern. The potential for water damage and costly roof repairs makes addressing this issue a top priority. In this discussion, we will explore the step-by-step process of effectively repairing a leaking roof shingle. From inspecting the flashing and shingles to applying the necessary repairs using rubberized roofing patch or roofing cement, we will provide you with expert guidance to confidently tackle this task. Additionally, we will delve into the importance of properly sealing vent pipes, chimney exhaust pipes, and other susceptible areas to prevent future leaks. By the end of this discussion, you will have the knowledge and tools to protect your property from water damage and ensure the longevity of your roof.
Key Takeaways
- Regularly inspect and maintain the roof and flashing to prevent future leaks.
- Use roofing cement to repair nail holes, cracks, and damaged flashing.
- Replace any curled, cracked, or missing shingles to maintain the integrity of the roof.
- Ensure proper water drainage and prevent water infiltration by applying roofing cement generously and tooling it for a professional finish.
Inspect for Leaks
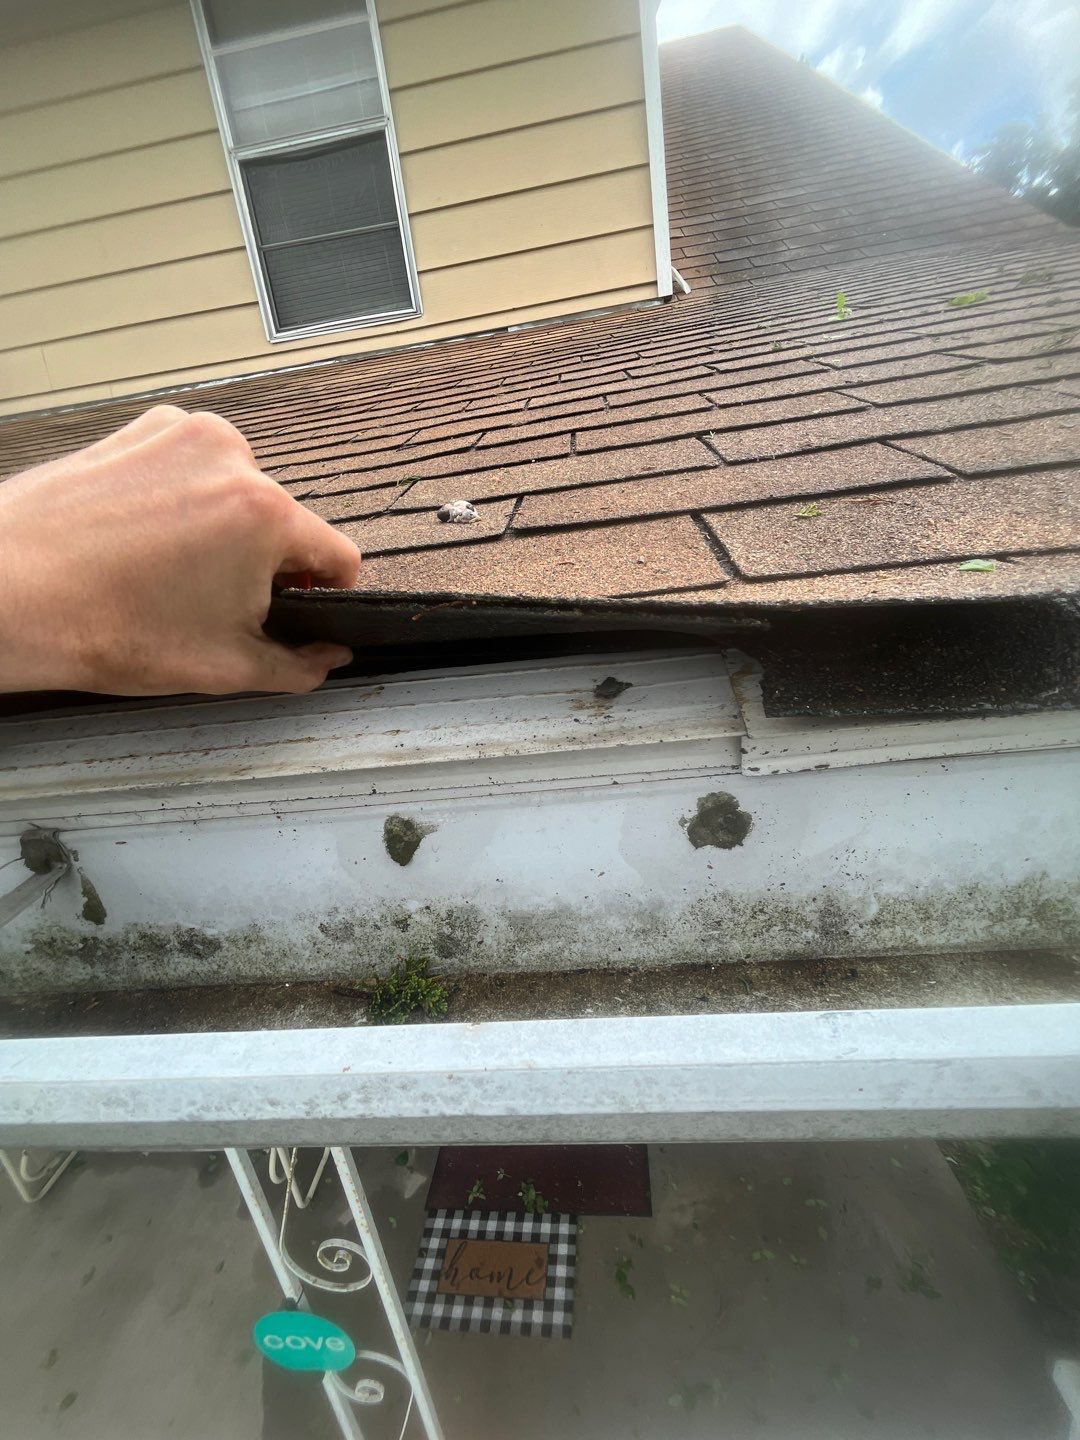 To identify the source of a roof leak, begin by examining the interior of the building for water stains on the ceiling. Water stains indicate a leaking roof shingle or some form of water damage. Once you have determined the potential location of the leak, you can then move on to inspecting the roof from the outside. Using binoculars, look for any curled, cracked, or missing shingles, as these can be signs of a damaged shingle that may be causing the leak. Pay particular attention to areas such as shingle butts, compromised caulking, flashing, and end caps. It is also important to inspect any tent-shaped shingles covering angular peaks, as they can be especially susceptible to leaks. Regularly inspecting and maintaining the roof, including the flashing, is crucial to prevent future leaks and water damage.
Check Flashing and Shingles
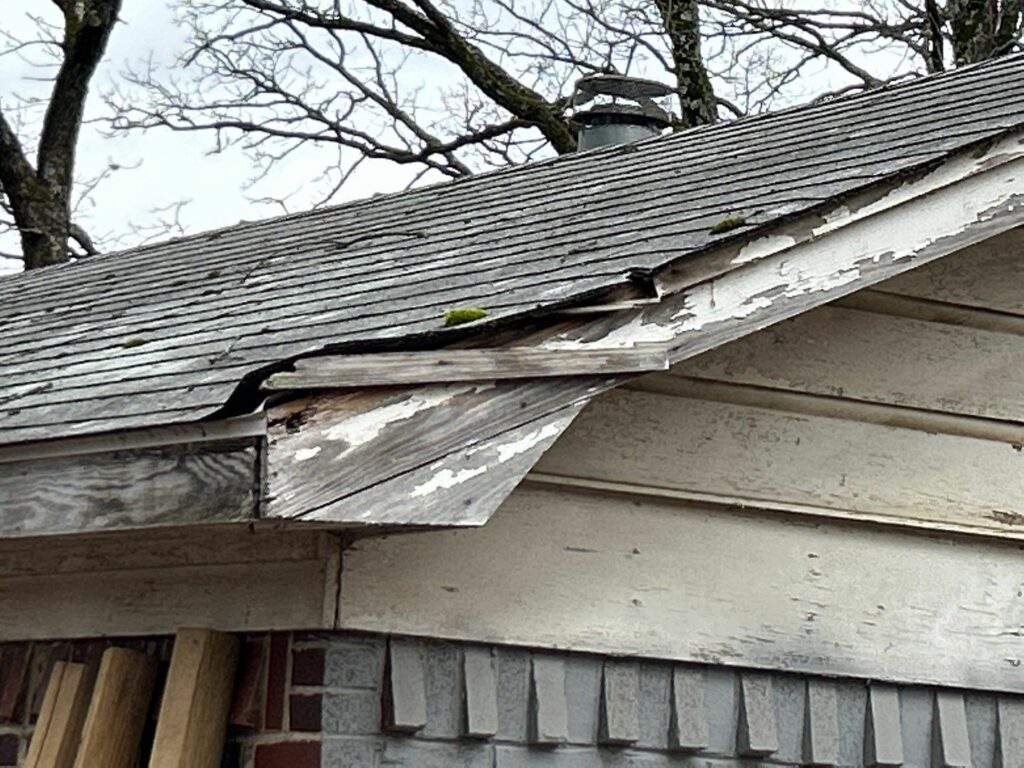 Inspect the flashing around chimneys, dormers, and vents for any cracks or gaps to identify potential areas of leakage. Flashing is an important component of the roofing system as it prevents water from seeping into the roof through vulnerable areas. Look for any curled, cracked, or missing shingles that may also be causing leaks. If you find any damaged or missing shingles, lift the edges of the surrounding shingles and remove and replace them. Use a caulking gun filled with roofing cement to reseal the flashing around chimneys and vents, ensuring a watertight seal. Regularly inspect and maintain the flashing to prevent future leaks. Taking the time to check the flashing and shingles will help identify any potential issues and ensure a durable and leak-free roof.
Spread Roofing Patch or Cement
After thoroughly checking the flashing and shingles for any cracks or gaps, the next step in repairing a leaking roof shingle is to address the issue by spreading roofing patch or cement. This patch or cement can be used to fill nail holes and cracks in the flashing, as well as seal leaks around chimney pipes, skylight flashing, vent pipes, and exposed nails. It is suitable for various types of roofing materials, including asphalt shingles. The patch or cement is available in gallon or caulking tube sizes to accommodate different repair needs. One advantage of this method is that it can be applied wet, allowing for immediate repair, even in rainy conditions. However, it is important to note that for complex repairs or for those lacking experience, it is always recommended to consult a professional roofer or consider replacing the damaged shingle with a new one.
| Spread Roofing Patch or Cement |
|---|
| – Fill nail holes and cracks in flashing |
| – Seal leaks around chimney pipes, skylight flashing, vent pipes, and exposed nails |
| – Suitable for asphalt shingles and other roofing materials |
| – Available in gallon or caulking tube sizes |
| – Can be applied wet for immediate repair, even in the rain |
Fill Nail Holes and Cracks
To effectively address the issue of nail holes and cracks in the shingles, it is essential to fill them with roofing cement or an equivalent compound to prevent water infiltration. Here are four key steps to follow when filling nail holes and cracks in your shingles:
- Inspect your shingles thoroughly for any signs of nail pops or cracks. These can be potential entry points for water during rain or snow.
- Use a putty knife to carefully apply the roofing cement into the nail holes and cracks. Make sure to spread the cement evenly and cover the entire affected area.
- Apply a generous amount of roofing cement to ensure that the holes and cracks are completely filled. This will create a watertight seal and prevent any further leakage.
- Smooth the surface of the cement using the putty knife to ensure a tight seal and proper water drainage off the shingle.
Apply Patch or Cement Around Chimney Pipes
Applying roofing cement around cis an essential step in preventing leaks and ensuring the integrity of your roof. When locating the leak and performing roof repairs, it is important to inspect the flashing around chimneys. To fix any roof leaks in this area, apply a patch or cement around the chimney pipes. Start by generously applying roofing cement to create a watertight seal. Make sure to spread the cement evenly, covering any gaps or cracks. To achieve a professional finish, use a putty knife to tool the cement. Regularly inspect and maintain the cement around chimney pipes to prevent future leaks and maintain the overall condition of your roof.
Tool the Patch or Cement for Water Flow
When addressing leaks around chimney pipes, it is crucial to properly tool the patch or cement for optimal water flow and long-lasting results. Here are four steps to follow:
- Start by using a utility knife to remove any excess patch or cement around the area. This will ensure a clean and smooth surface for the water to flow.
- Next, use a pry bar to gently lift any shingles that are covering the patch or cement. By doing this, you can ensure that the water will not be trapped underneath the shingles, causing further damage.
- Check for any nail heads that may be sticking out and causing a potential leak. Use the pry bar to push them back in or replace them if necessary.
- Lastly, make sure to tool the patch or cement in a way that encourages water to flow away from the area. This can be done by creating a slight slope or using a trowel to smooth the edges.
Inspect and Repair Vent and Chimney Seals
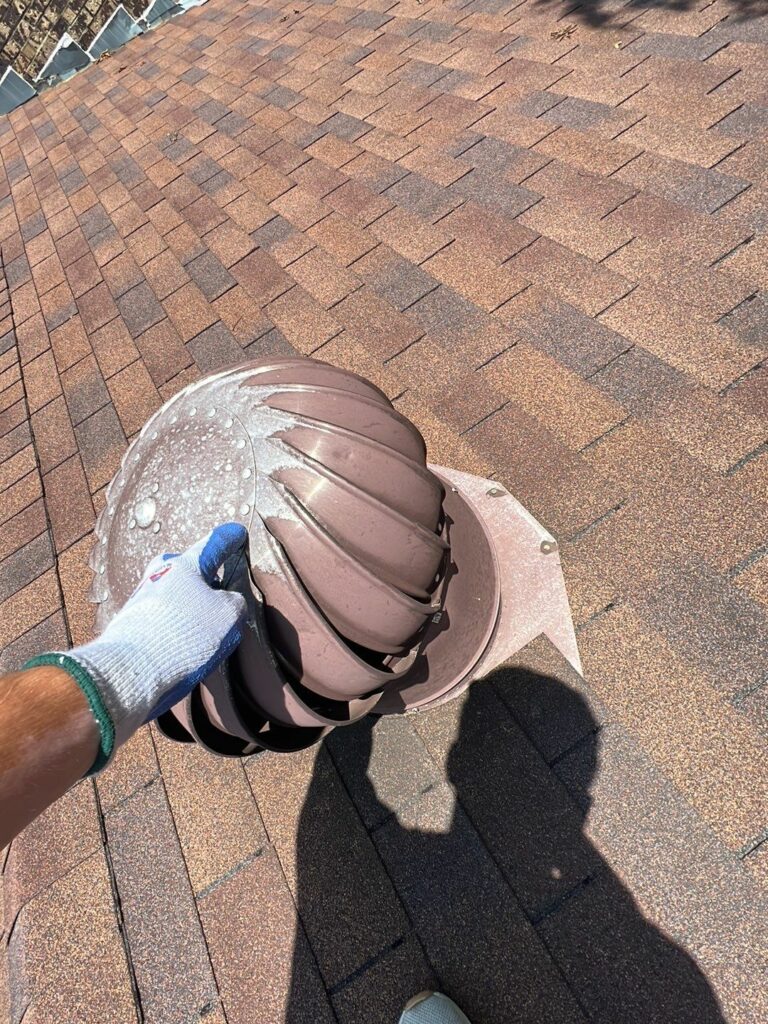 Inspecting and repairing the seal around vent pipes and chimney exhaust pipes is essential to prevent leaks and maintain the integrity of the roof. These areas are common sources of water penetration, so regular inspection and maintenance are crucial. Use a utility knife to carefully inspect the seals for any cracks or damage. If any issues are found, they should be promptly repaired using roofing patch or cement. Apply the patch or cement to fill in the cracks, ensuring a neat and even application. Allow it to dry completely before painting. By addressing these potential problem areas, you can effectively prevent leaks and prolong the lifespan of your roof.
Fill Cracks Around AC, Heating, and Cable Lines
To effectively prevent leaks, it is important to fill cracks around AC, heating, and cable lines on the roof. Here are four steps to follow:
- Inspect for leaks: Check around AC and heating units for any signs of leaks, such as water stains or dampness.
- Fill grooves and chafed shingles: Use roofing patch or cement to fill any grooves or chafed shingles caused by cable lines. This will prevent water from seeping through these vulnerable areas.
- Apply patch or cement: Apply the patch or cement to any type of flashing or vents in the vicinity of the AC, heating, or cable lines. This will create a watertight seal and prevent leaks.
- Regularly inspect and repair: Regularly inspect the area around AC, heating, and cable lines for any damage or cracks. If any issues are found, promptly repair them using the patch or cement to ensure the roof remains leak-free.
Remember to regularly maintain and inspect your roof to prevent future leaks.
Regular Maintenance and Inspection
Regular maintenance and inspection of your roof is crucial to ensure its longevity and prevent any potential leaks. Also call us here at Luck Roofing for top notch advice on any roof issues you may have .By regularly inspecting your roof, you can catch any issues early on and address them before they become major problems. Here are some key areas to focus on during your roof maintenance:
| Area to Inspect | What to Look For | Action to Take |
|---|---|---|
| Shingles | Missing, damaged, or | Replace any damaged or |
| curling shingles | missing shingles | |
| Flashing | Cracks or gaps | Apply roofing patch or cement |
| to seal any cracks or gaps | ||
| Gutters | Clogs or debris | Clean out any clogs or debris |
And To Finish
In conclusion, effectively repairing a leaking roof shingle is crucial to prevent further damage to your property. By following the step-by-step instructions and valuable insights provided in this guide, you can confidently tackle this task. Remember to inspect the flashing and shingles, apply roofing patch or cement, seal vent and chimney areas, and regularly maintain and inspect your roof to prevent future issues. Following these expert tips will ensure the longevity and functionality of your roof while protecting against water damage.
Michael Overzat
Michael Overzat resides in Fort Smith, Arkansas with his wife and three kids. He enjoys to hike, skateboard, write, and get involved in charity organizations. He was originally born in Maryland. He has worked within the roofing industry for 5 years and is very active within the industry by attending conferences, masterminds, etc. His vision is to create a multi-state organization that has a customer centric model. He's worked for some of the biggest names in the industry and hopes to create a more people focused model for the roof replacement process.